
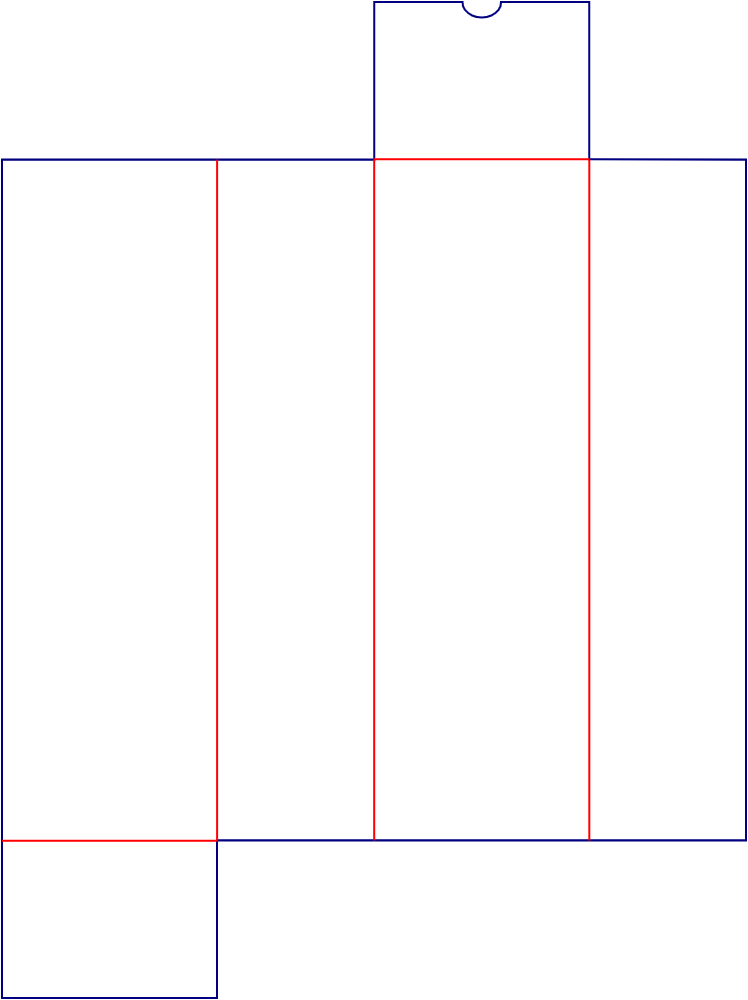
Reference rendering of the folded insert. The matching outer carton is specified separately.
Custom Rectangular Carton Inserts
A folded rectangular insert with four body panels and two end panels. Plan the fit inside an outer carton and identify the surfaces visible after assembly.
- Style reference
- E60002
- Structure
- Four body panels · two end panels
- Dimensions
- Custom size, confirmed for your product
- Material
- Kraft appearance shown; paperboard specification to confirm
Size around your product.
Share the outer carton's internal dimensions and the product dimensions. Review the insert's assembled size and clearance as a separate specification.
- L
- LengthThe span across the broad body panel when assembled.
- W
- WidthThe depth established by the narrow side panels.
- H
- HeightThe assembled height along the upright body panels.
The outer carton size is not automatically the insert size. Allow for paperboard thickness, end folds and the product fit.
Add your target size
Your values appear on the diagram and in your inquiry. The reference drawing stays at its original proportions.
Design for the finished product.
Four connected body panels wrap around the rectangular form. Select a panel group to see how to approach printed surfaces and the end details.
Start with the surface people will see.
If the insert will be printed, place the primary artwork on a broad panel intended to remain visible.
- Confirm the viewing face in the assembled outer carton.
- Keep the logo and text inside the usable panel area.
- Treat any artwork on the outer carton as a separate design.
Carry the background around the sides.
Use narrow panels for supporting content only where it remains readable and visible after the insert is fitted.
- Align repeating patterns across the body folds.
- Keep critical text clear of panel edges.
- Check how much of each side remains visible in the outer carton.
Respect the fold and the notch.
The two end panels fold at opposite ends. One includes a semicircular notch that needs space in the artwork layout.
- Keep essential text clear of the notch and cut edges.
- Confirm which end is visible in the intended assembly.
- Check end-panel orientation on a folded sample.
Prepare artwork on the approved production dieline at final size. Confirm bleed, print sides and safe margins before printing.
Request a production dielineTry your artwork on this reference
Select an area on the reference, add text or your logo, then adjust its direction and repeat pattern. Download a placement preview to include with your inquiry.
No target size added. Add your dimensions to include them in the preview.
Use the position fields as an alternative to dragging. Values are percentages of this reference image.
Loading the reference…
A placement concept, not a print-ready file. Confirm print sides, cutouts, glue areas and safe margins on your production layout. Your uploaded image stays in this browser.
- Keep the layers separate.
Place the dieline on its own reference layer. Keep it out of the printed artwork unless your production file instructions say otherwise.
- Check the reading direction.
Review logos and text in the finished orientation. Carry patterns across folds only after checking their alignment.
- Approve a physical reference.
Use the appropriate sample to check fit, opening and print position before confirming production.
Request a quote for this style.
Send your dimensions, quantity and artwork requirements for style E60002.
- Target size and measurement basis
- Quantity, product details and intended use
- Logo, artwork and finishing ideas
Need to check it in hand? Explore sample options ↗
Recommended sizes & materials for common products.
Plan this folded liner together with the outer carton. These examples suggest the insert's assembled external envelope; the outer carton's internal size needs a separate fit check.
| Product & example size | Suggested assembled insert size (external) | Material to consider | Selection & fit notes |
|---|---|---|---|
| A cosmetic squeeze tubeExample packed product: 35 × 25 × 100 mm |
45 × 35 × 120mm · L × W × H | Kraft paperboard | A kraft appearance for the visible liner. Include the cap and crimped end when measuring the tube. |
| A sleeved pen or slim stationery itemExample packed product: 20 × 15 × 145 mm |
45 × 30 × 160mm · L × W × H | SBS white paperboard | A white surface for printed instructions or branding. Review movement inside the liner. |
| A small, already wrapped accessoryExample packed product: 65 × 25 × 135 mm |
75 × 35 × 150mm · L × W × H | SBS white paperboard | Use the visible broad panel for product information. Check the wrapped item and outer carton together. |
| A sleeved grooming or craft toolExample packed product: 35 × 20 × 155 mm |
45 × 30 × 175mm · L × W × H | Kraft paperboard | A narrow folded liner for an elongated item. Review end clearance and ease of removal. |
Dimensions are suggested design starting points, not fixed stock sizes. Confirm paperboard thickness, fold allowances and the product clearance with a sample. This liner does not by itself establish cushioning or product retention; specify additional support where needed.
Discuss your size & material